How a 2011 Kindle Became My Home's Pip-Boy.
Table of Contents
-
How a Kindle from the Past Became My Smart Home Hub
- The Concept: An Interface That Survives Any Apocalypse
- Technical Implementation
- Software
- Hardware
- Jailbreaking with Current Developer Certificates
- Guide for Previously Jailbroken Kindles with KUAL
- Installing KUAL and WebLaunch
- Structure and Configuration of the settings.js File
- Now It's Your Turn!
- Conclusion
How a Kindle from the Past Became My Smart Home Hub
This tutorial is for my dear friend J. and everyone else who might have an old Kindle device lying around and wants to use it as a Smart Home dashboard - or simply because they enjoy such projects. In 2020, my brother-in-law gave me his old Kindle 4 Touch that he no longer needed. Originally, I wanted to use it as an e-book reader, but after a few weeks, I noticed I barely used it. So I started looking for other uses.
The Concept: An Interface That Survives Any Apocalypse
The Kindle should be like a Pip-Boy. Well... um... at least a little bit. It should allow me to control my smart home and Squeezebox players without constantly having to use my smartphone or PC. The device is robust and uses little power. Plus, it has an E-Ink screen that's easily readable even in direct sunlight - perfect for use in various lighting conditions. It also serves as a display for different images (depending on the weather) and garbage collection schedules should be visible too. So almost like a Pip-Boy, except for weapons and the rest. The only thing that might remind you of it is the fact that the device controls music and is simply old.
Technical Implementation
The project is based on several technologies and components:
Software
- HTML for structure
- CSS for design and proper display on the E-Ink screen
- JavaScript for interactivity
- PHP for server-side logic
Hardware
- Jailbroken Kindle 4 Touch as display and control device
- Micro-USB cable for power supply
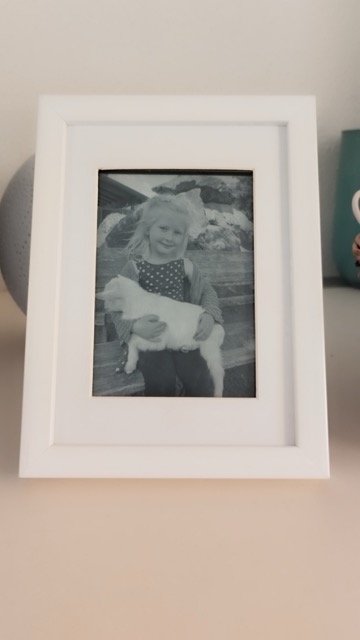
- Picture frame as case
Jailbreaking with Current Developer Certificates
This year, the old developer certificates for the Mobileread Kindlet Kit actually expired, and extensions, especially KUAL (Kindle Unified Application Launcher) on previously jailbroken Kindle devices no longer work. But don't worry, there's a solution! With the new certificates from NiLuJe, everything runs smoothly again.
Here's a brief guide on how to jailbreak your Kindle 4 Touch:
- Preparation: Connect your Kindle to the computer and back up all important data.
- Download current updates for your Kindle: Download the latest firmware from the Amazon website. In this case (Kindle 4 Touch), your Kindle must be updated to version 5.3.7.3. Copy the .bin file to the Kindle's root directory and install it via "Menu" -> "Settings" -> "Menu" -> "Update Kindle". The device will restart afterward.
- Download jailbreak files: Download the current jailbreak files.
- Prepare the jailbreak: Extract the downloaded files and copy the contents of kindle-5.4-jailbreak.zip to your Kindle's root directory.
- Replace certificates: Download the new certificates from NiLuJe and replace the old developer.keystore file in your Kindle's root directory.
- Install the jailbreak: Activate the jailbreak via "Menu" -> "Settings" -> "Menu" -> "Update Kindle". If everything worked, **Jailbreak** should appear at the bottom of the screen. The device must be restarted afterward.
Guide for Previously Jailbroken Kindles with KUAL
If your Kindle is already jailbroken, you can directly replace the certificates by downloading the following file from NiLuJe and placing the appropriate .bin file for your Kindle in your Kindle's root directory. In this case, it would be Update_mkk-20250419-k4-ALL_keystore-install.bin. Then you can install the file via "Menu" -> "Settings" -> "Menu" -> "Update Kindle". KUAL should work again.
Installing KUAL and WebLaunch
- Download and install KUAL: Download the latest version of KUAL. Extract the ZIP file and copy the KUAL-KDK-2.0.azw2 file to your Kindle's documents directory.
- Download and install WebLaunch: Download the latest version of WebLaunch. Extract the ZIP file and copy the entire contents into a directory named WebLaunch in your Kindle's extensions directory.
- Configure WebLaunch: Create a settings.js file in the WebLaunch directory and customize it (see below). Start KUAL on your Kindle's home screen, select WebLaunch, and the website should appear.
Structure and Configuration of the settings.js File
/
├── extensions/
│   ├── WebLaunch/
│   │   ├── All WebLaunch files and
|   │   └── settings.js
|── documents/
│   ├── KUAL-KDK-2.0.azw2
var settings = {
	url: 'http://192.168.178.***', // IP address of your dashboard (make sure it's accessible via HTTP), you can also specify a local HTML file, e.g. 'control.html', which must then be in the 'bin' folder.
	title: 'Pip-Boy Home',
	hideStatusbar: true,
	enableWireless: true,
	powerButtonClose: true,
	enablePreventScreenSaver: false,
	landscape: false
};
Now It's Your Turn!
After successfully jailbreaking your Kindle and installing KUAL and WebLaunch, you can now create your own Smart Home dashboard. Here's a simple example of how you can design an HTML page for your dashboard:
<!DOCTYPE html>
<html lang="en">
<head>
	<meta charset="UTF-8">
	<meta name="viewport" content="width=device-width, initial-scale=1.0">
	<title>Smart Home Dashboard</title>
</head>
<body>
	<div class="dashboard">
		<h1>Welcome to Your Smart Home Dashboard</h1>
		<button onclick="toggleLight1()">Light On/Off</button>
		<!-- Here you can add more Smart Home control elements -->
	</div>
	<script>
		function toggleLight1() {
			// Here goes the code to control your Smart Home light
			let xmlhttp = new XMLHttpRequest();
			// Example for a Shelly API request
			xmlhttp.open("GET", "http://192.168.178.***/light/0?turn=toggle", true);
			xmlhttp.send();
			// Remember that Kindle only supports JavaScript with limited functionality. Modern features like fetch are missing.
		}
	</script>
</body>
</html>
Here's what my result looks like:
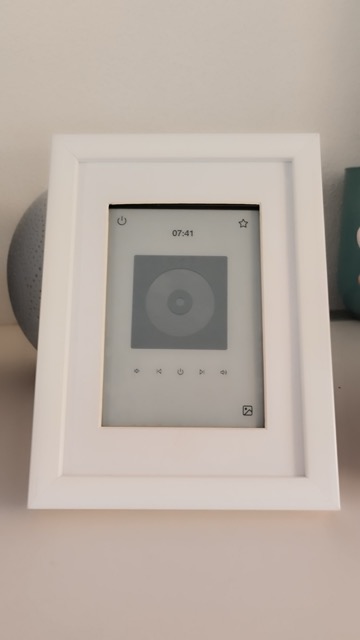
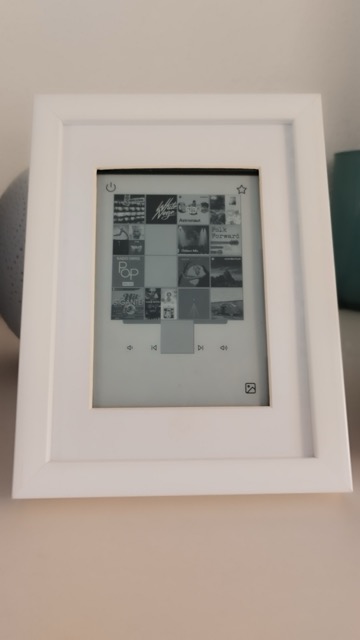
Conclusion
A dusty e-reader from 2011 has become a functional Smart Home dashboard - and with surprisingly little effort. The Kindle impresses with its power-efficient E-Ink screen, simple operation, and robust hardware.
What started as an experiment has now been running reliably for months and controls lights, music, and other Smart Home devices daily. Old hardware doesn't have to gather dust in the closet - sometimes it just needs a new purpose. And if the apocalypse does come, we already have a working terminal.