BLE Button with Deep Sleep: When an ESP32-S3 Becomes a Photo Trigger.
Table of Contents
- The Starting Point: A Wheel of Fortune Needs a Button
- The Concept: Three Requirements
- Hardware - Keep it simple!
- The Challenges: A Rocky Road to Success
- The Code: Compact and Well-Thought-Out
- How It Works: The Flow
- Power Supply with CR123A Battery
- Power Consumption: The Numbers
- The Most Important Insights
- Why You Should Try It Yourself
- Use at the Wheel of Fortune
- Outlook: What Else Would Be Possible
- Let's Go!
- Shopping List - Everything You Need
The Starting Point: A Wheel of Fortune Needs a Button
A while ago, I developed a digital wheel of fortune for tourism ministry. At events, people press a red USB-connected button to spin the wheel. And when they land on the right field, a photo should be taken - for memories, the guestbook, for Instagram. But not every field triggers a photo. That's why I needed a simple way to activate the photo trigger.
The idea: A wireless button that visitors can press to trigger the photo. Simple, right?
Spoiler: It wasn't. But in the end it works - and how! 🎉
The Concept: Three Requirements
I had clear ideas about what the button should be able to do:
- Battery-powered: No cables at events, please!
- Reliable: When pressed, it should send the key "2" (which triggers the photo function in my setup)
- Long battery life: I don't want to constantly change batteries
The solution: An ESP32-S3 with BLE (Bluetooth Low Energy) that acts as a keyboard and waits for button presses in Deep Sleep.
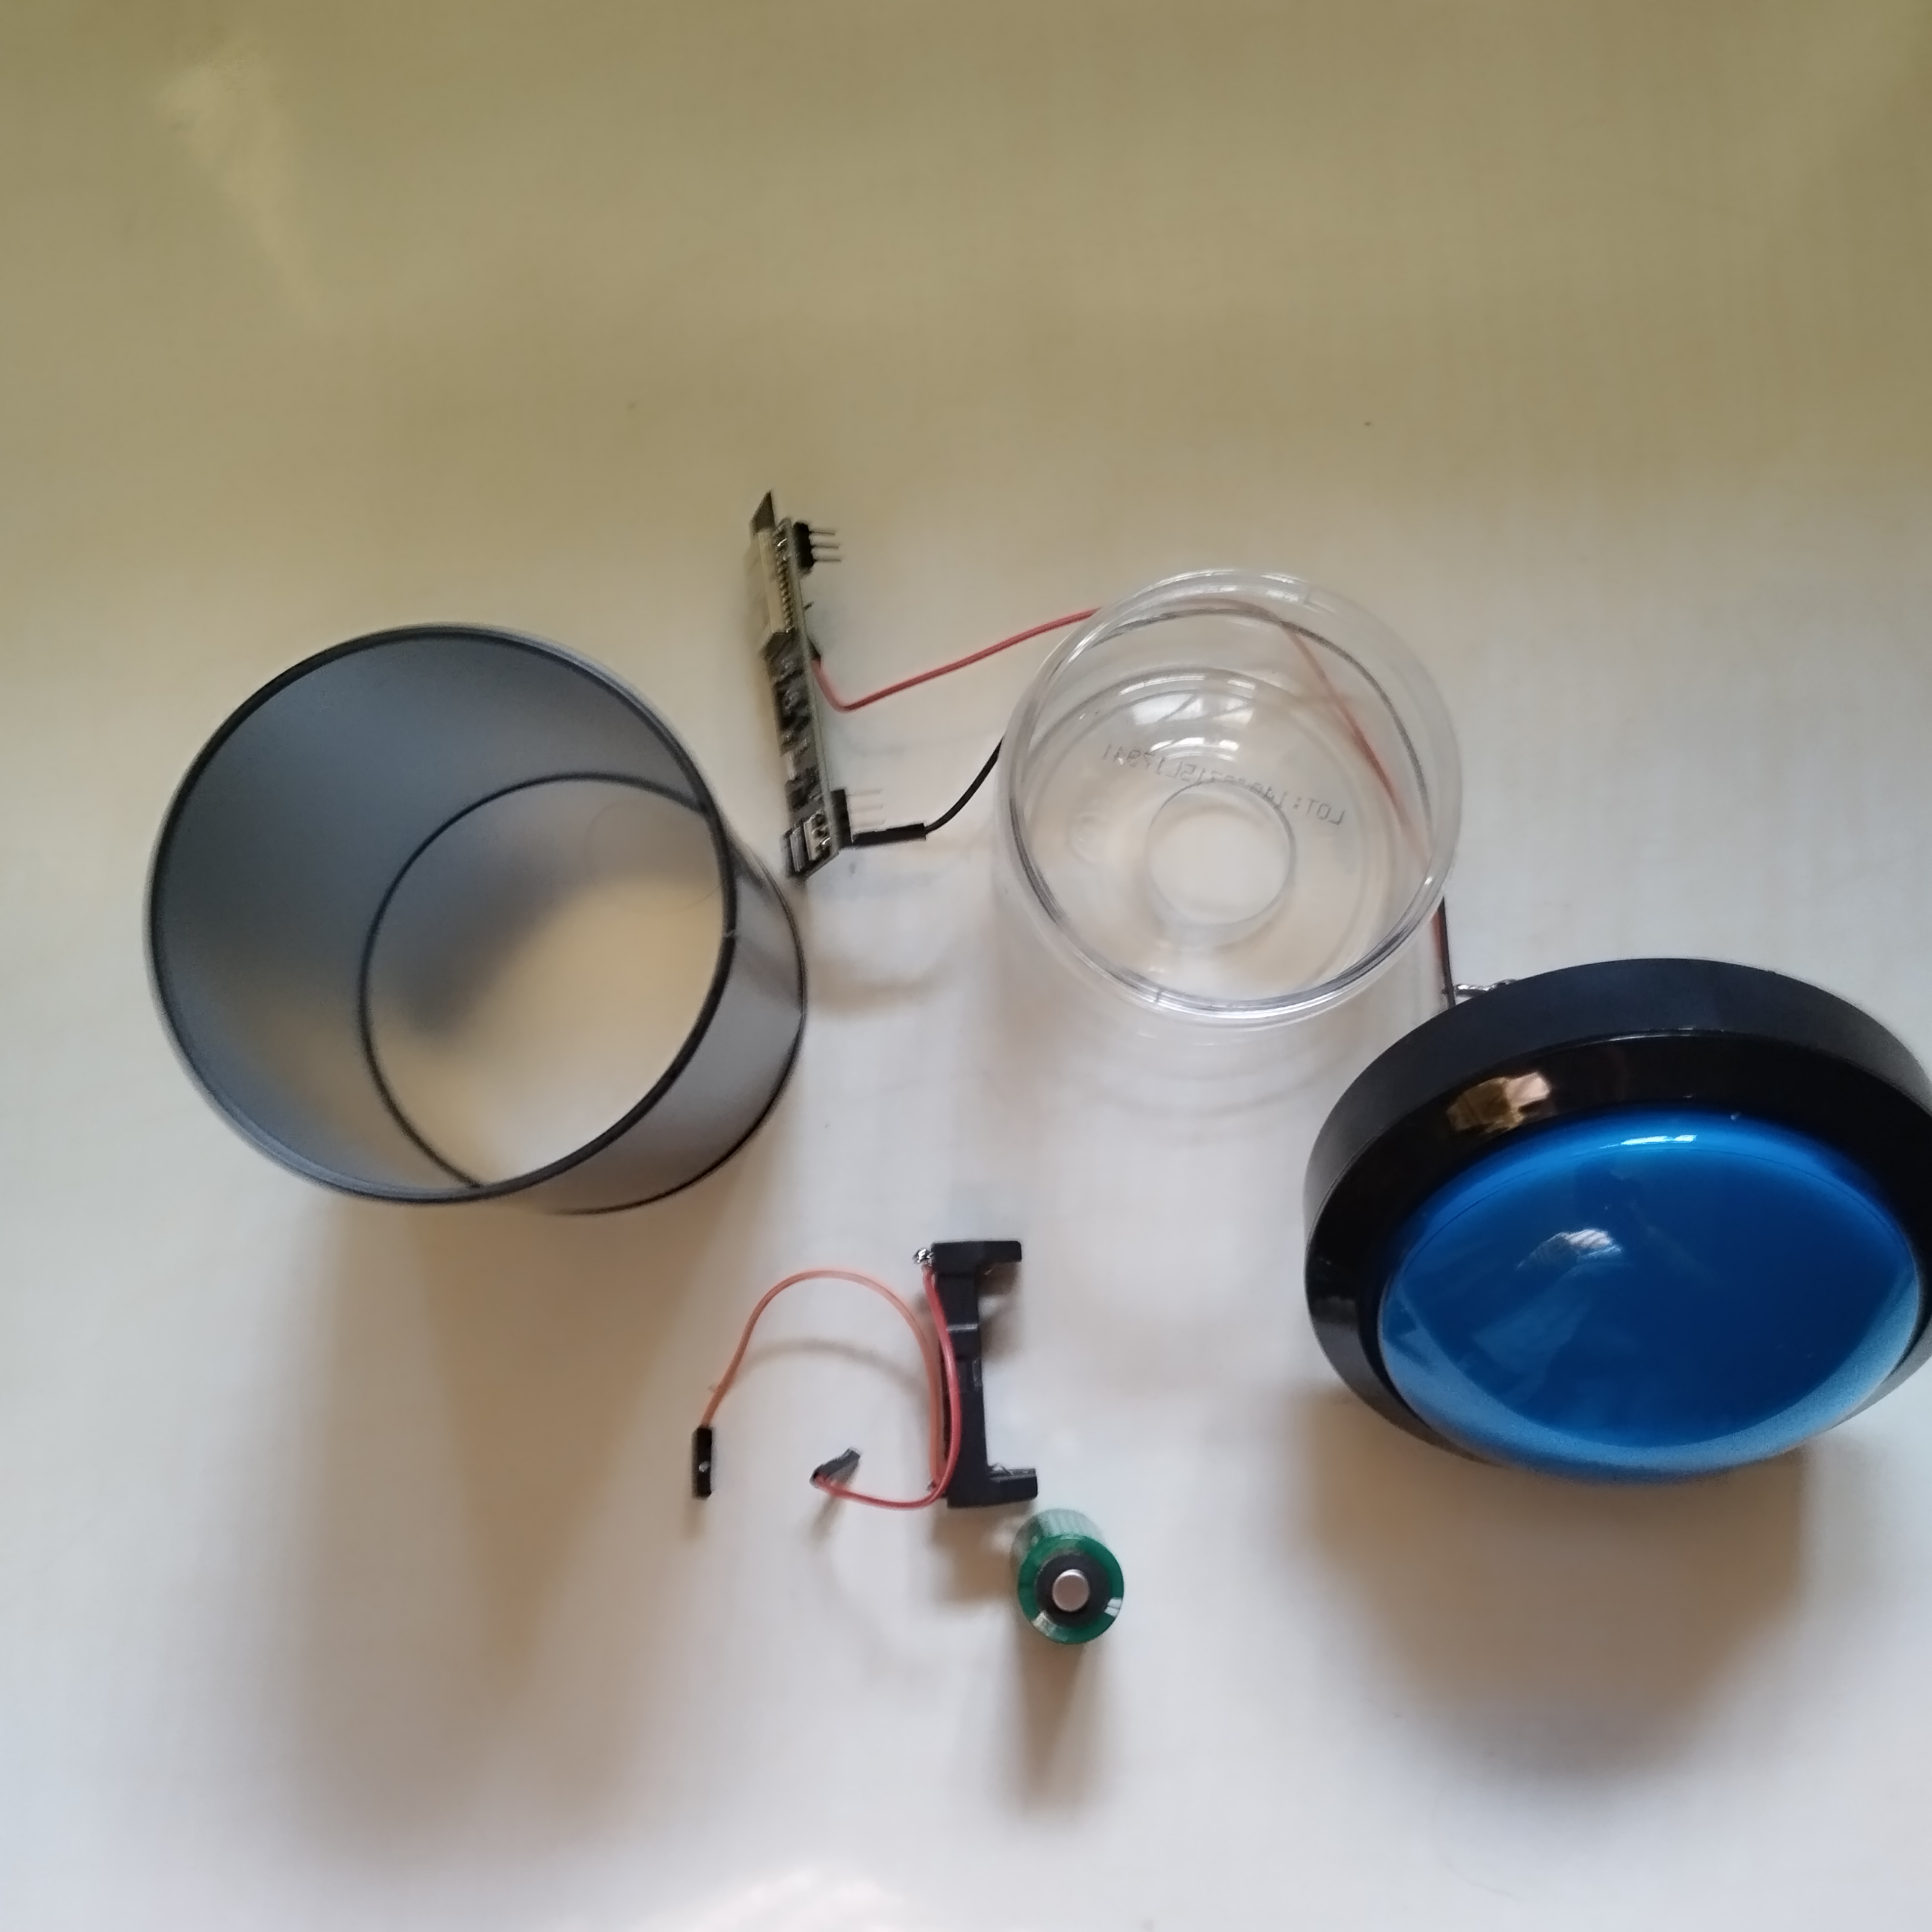
Hardware - Keep it simple!
For this project you really don't need much:
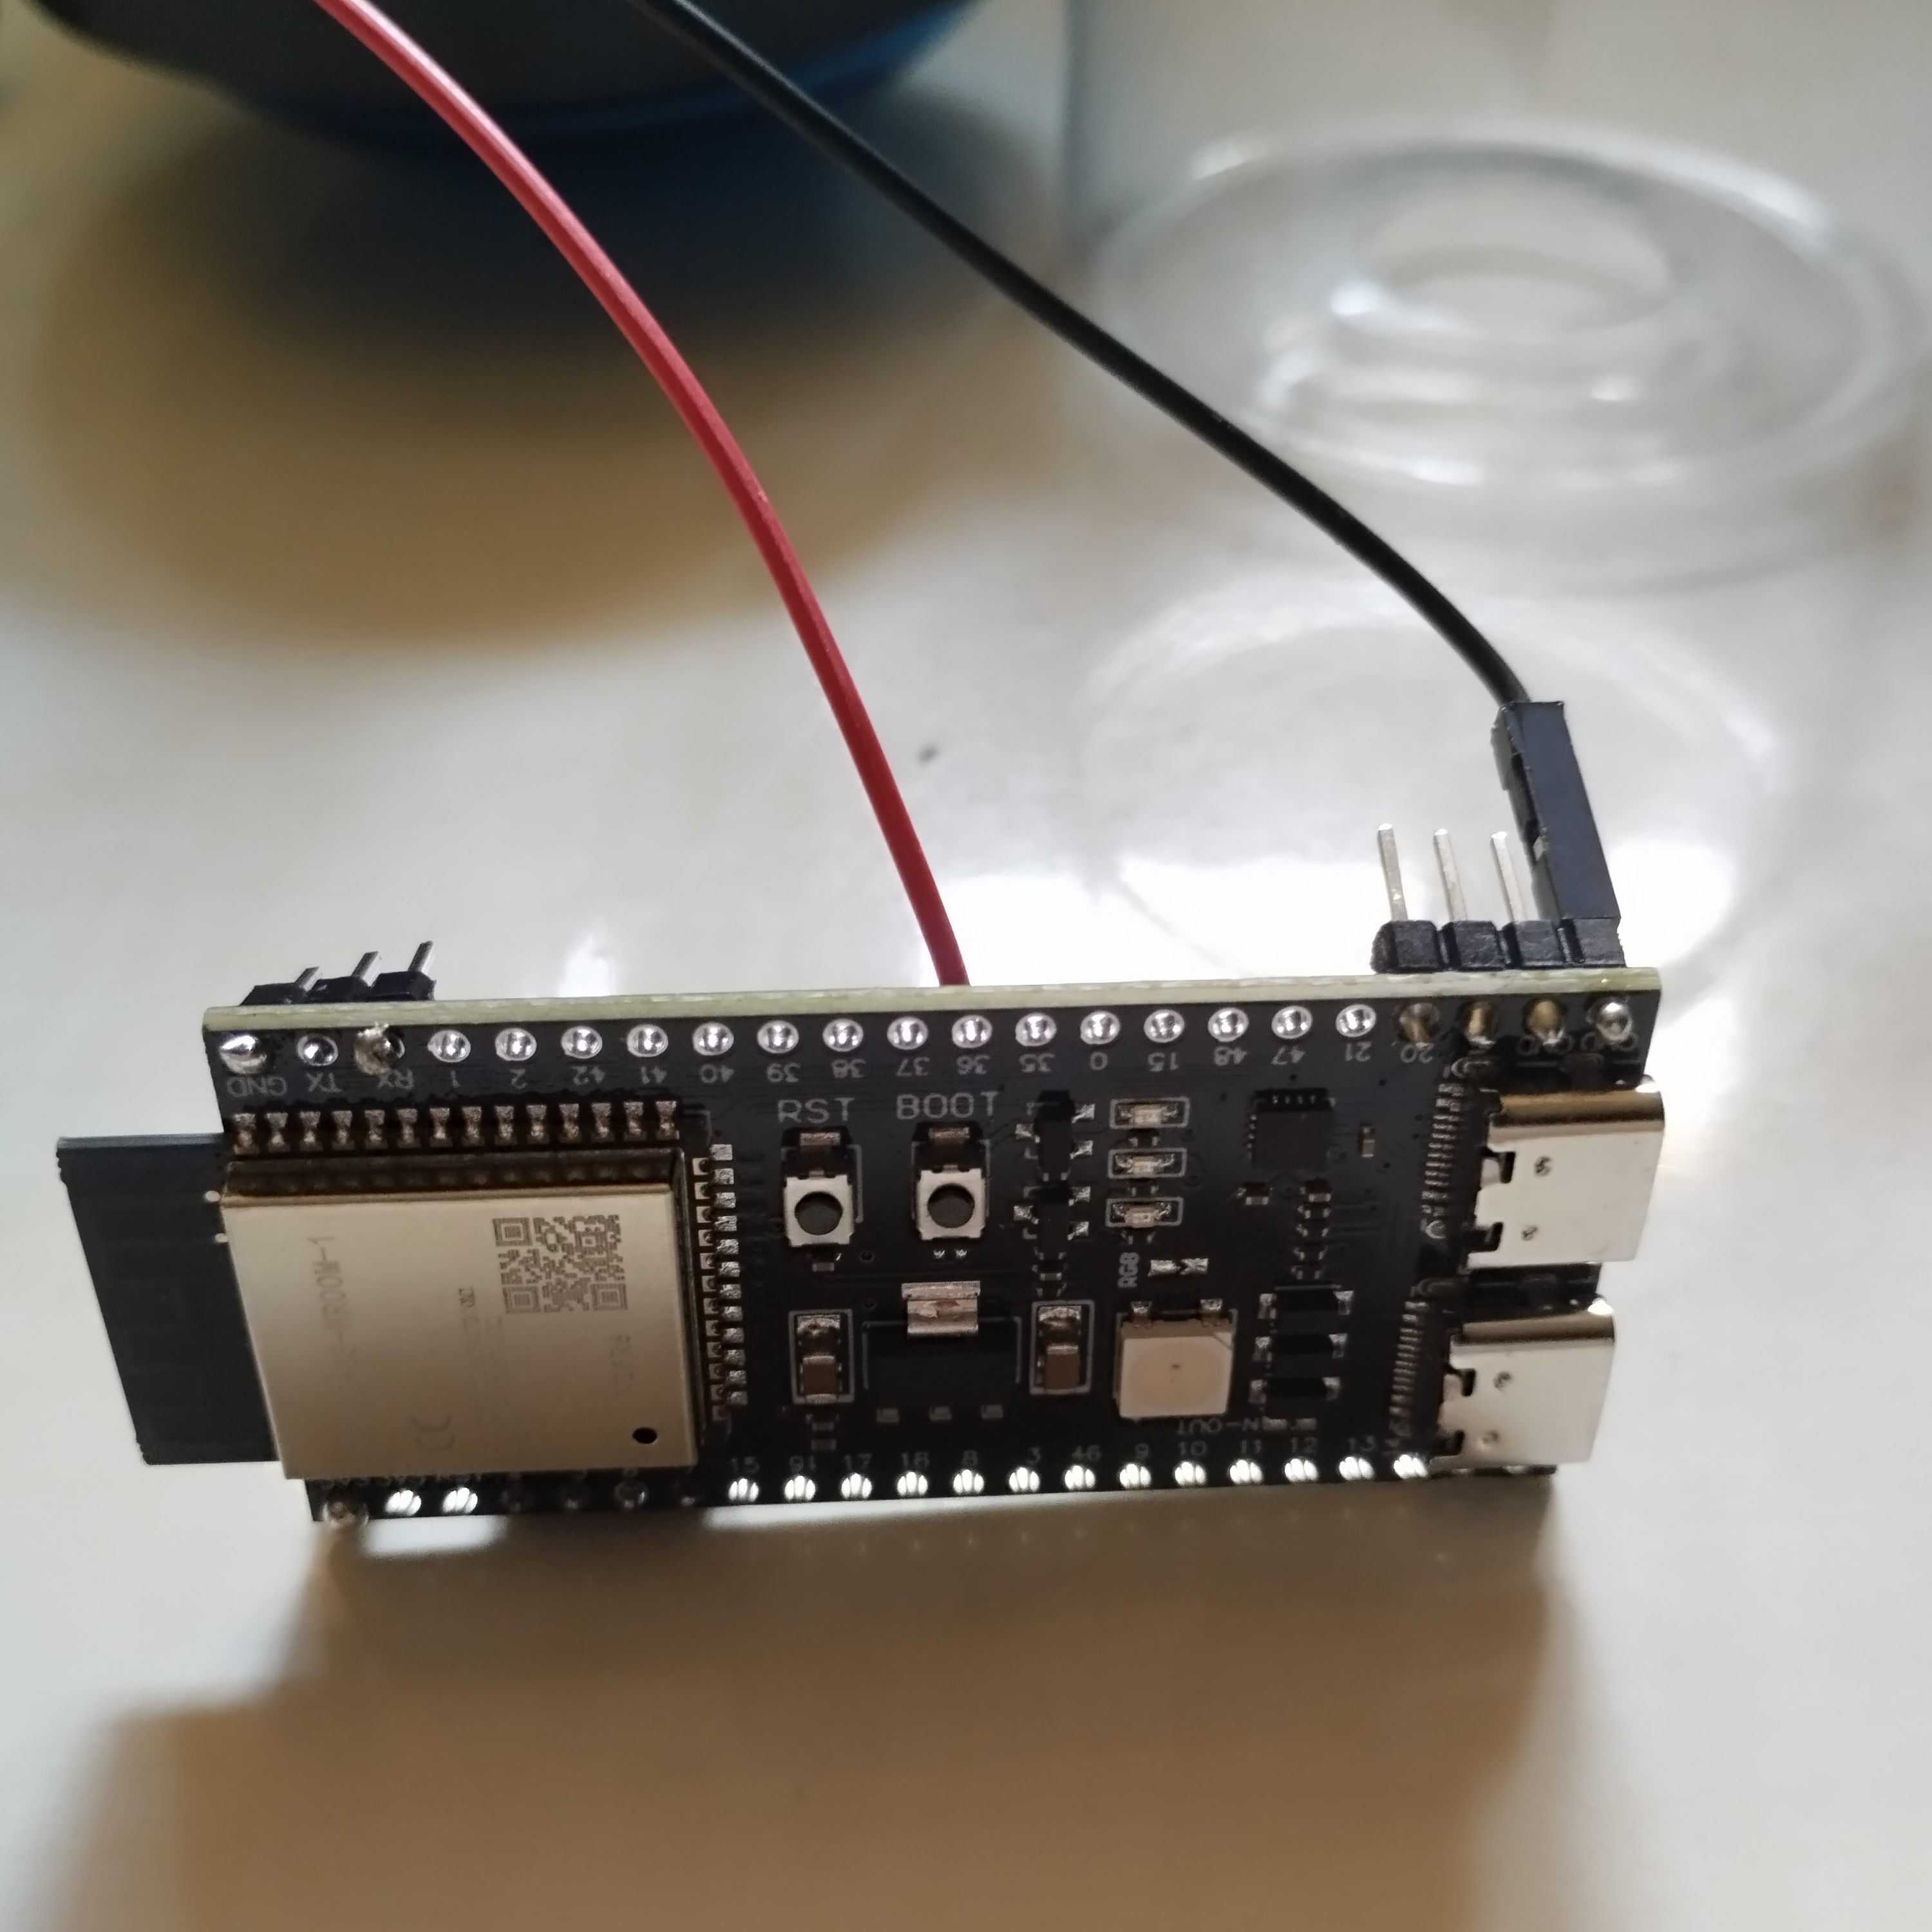
- ESP32-S3 Dev Module (~$5-10)
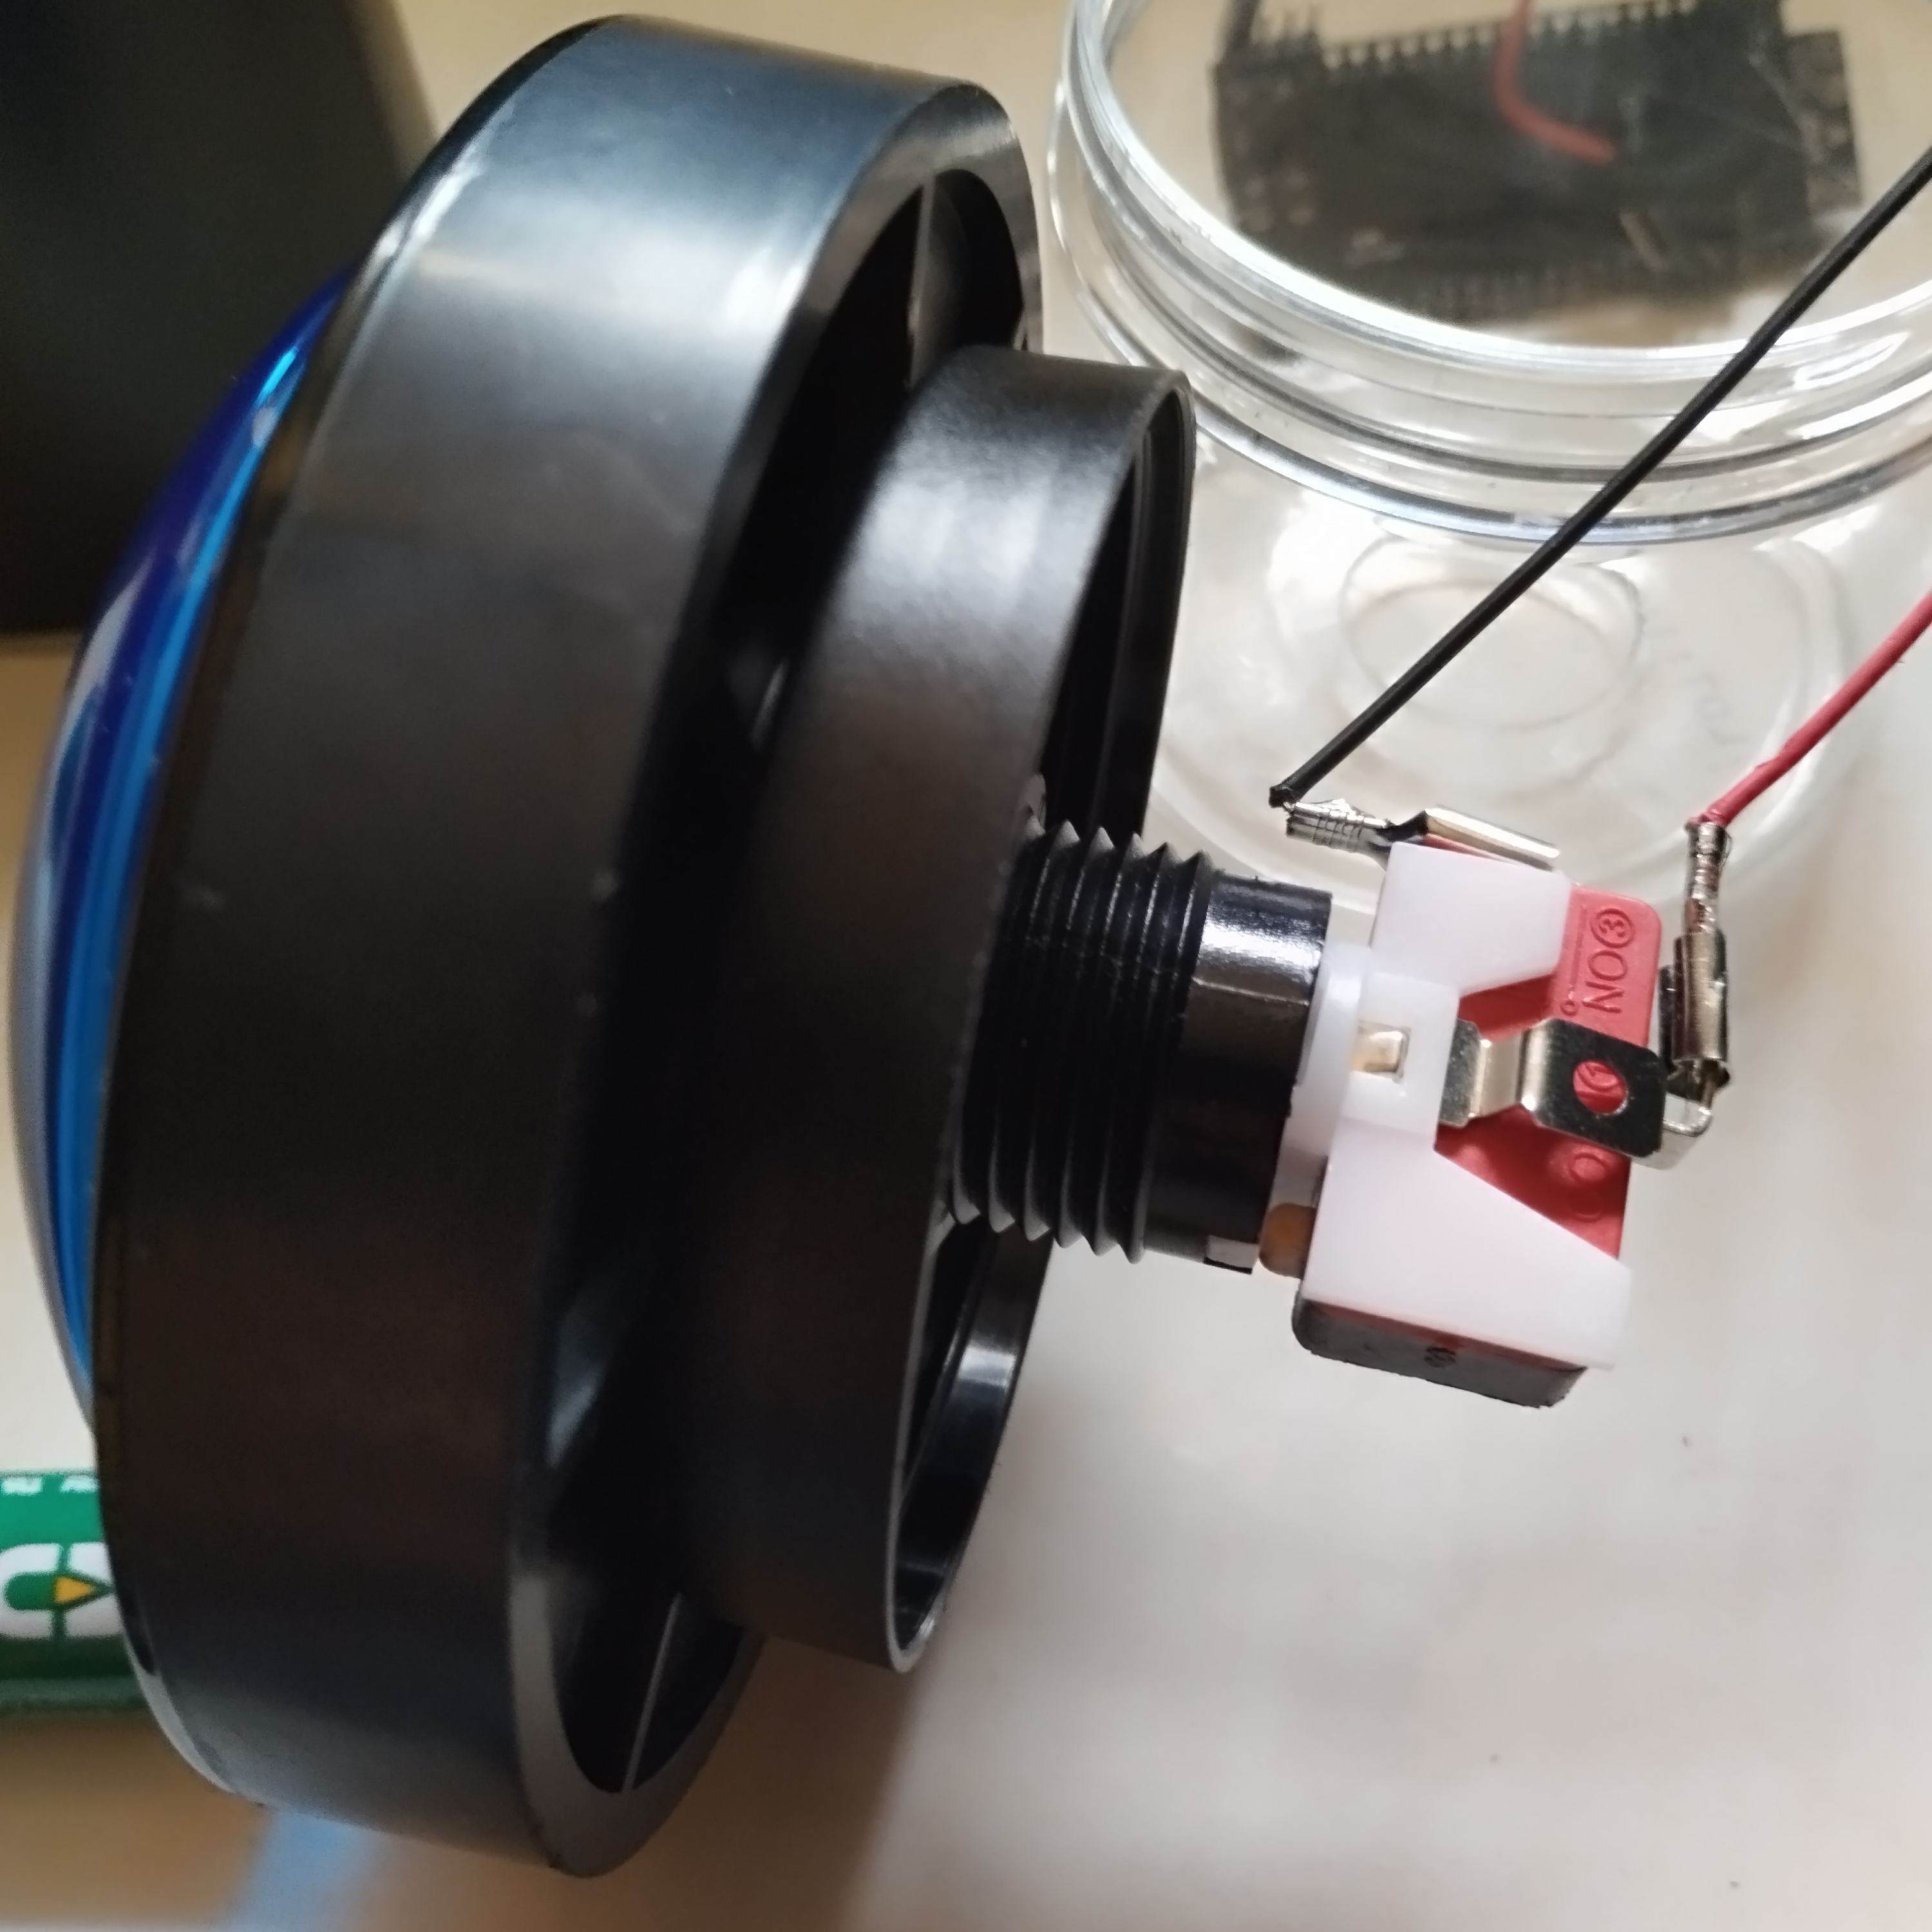
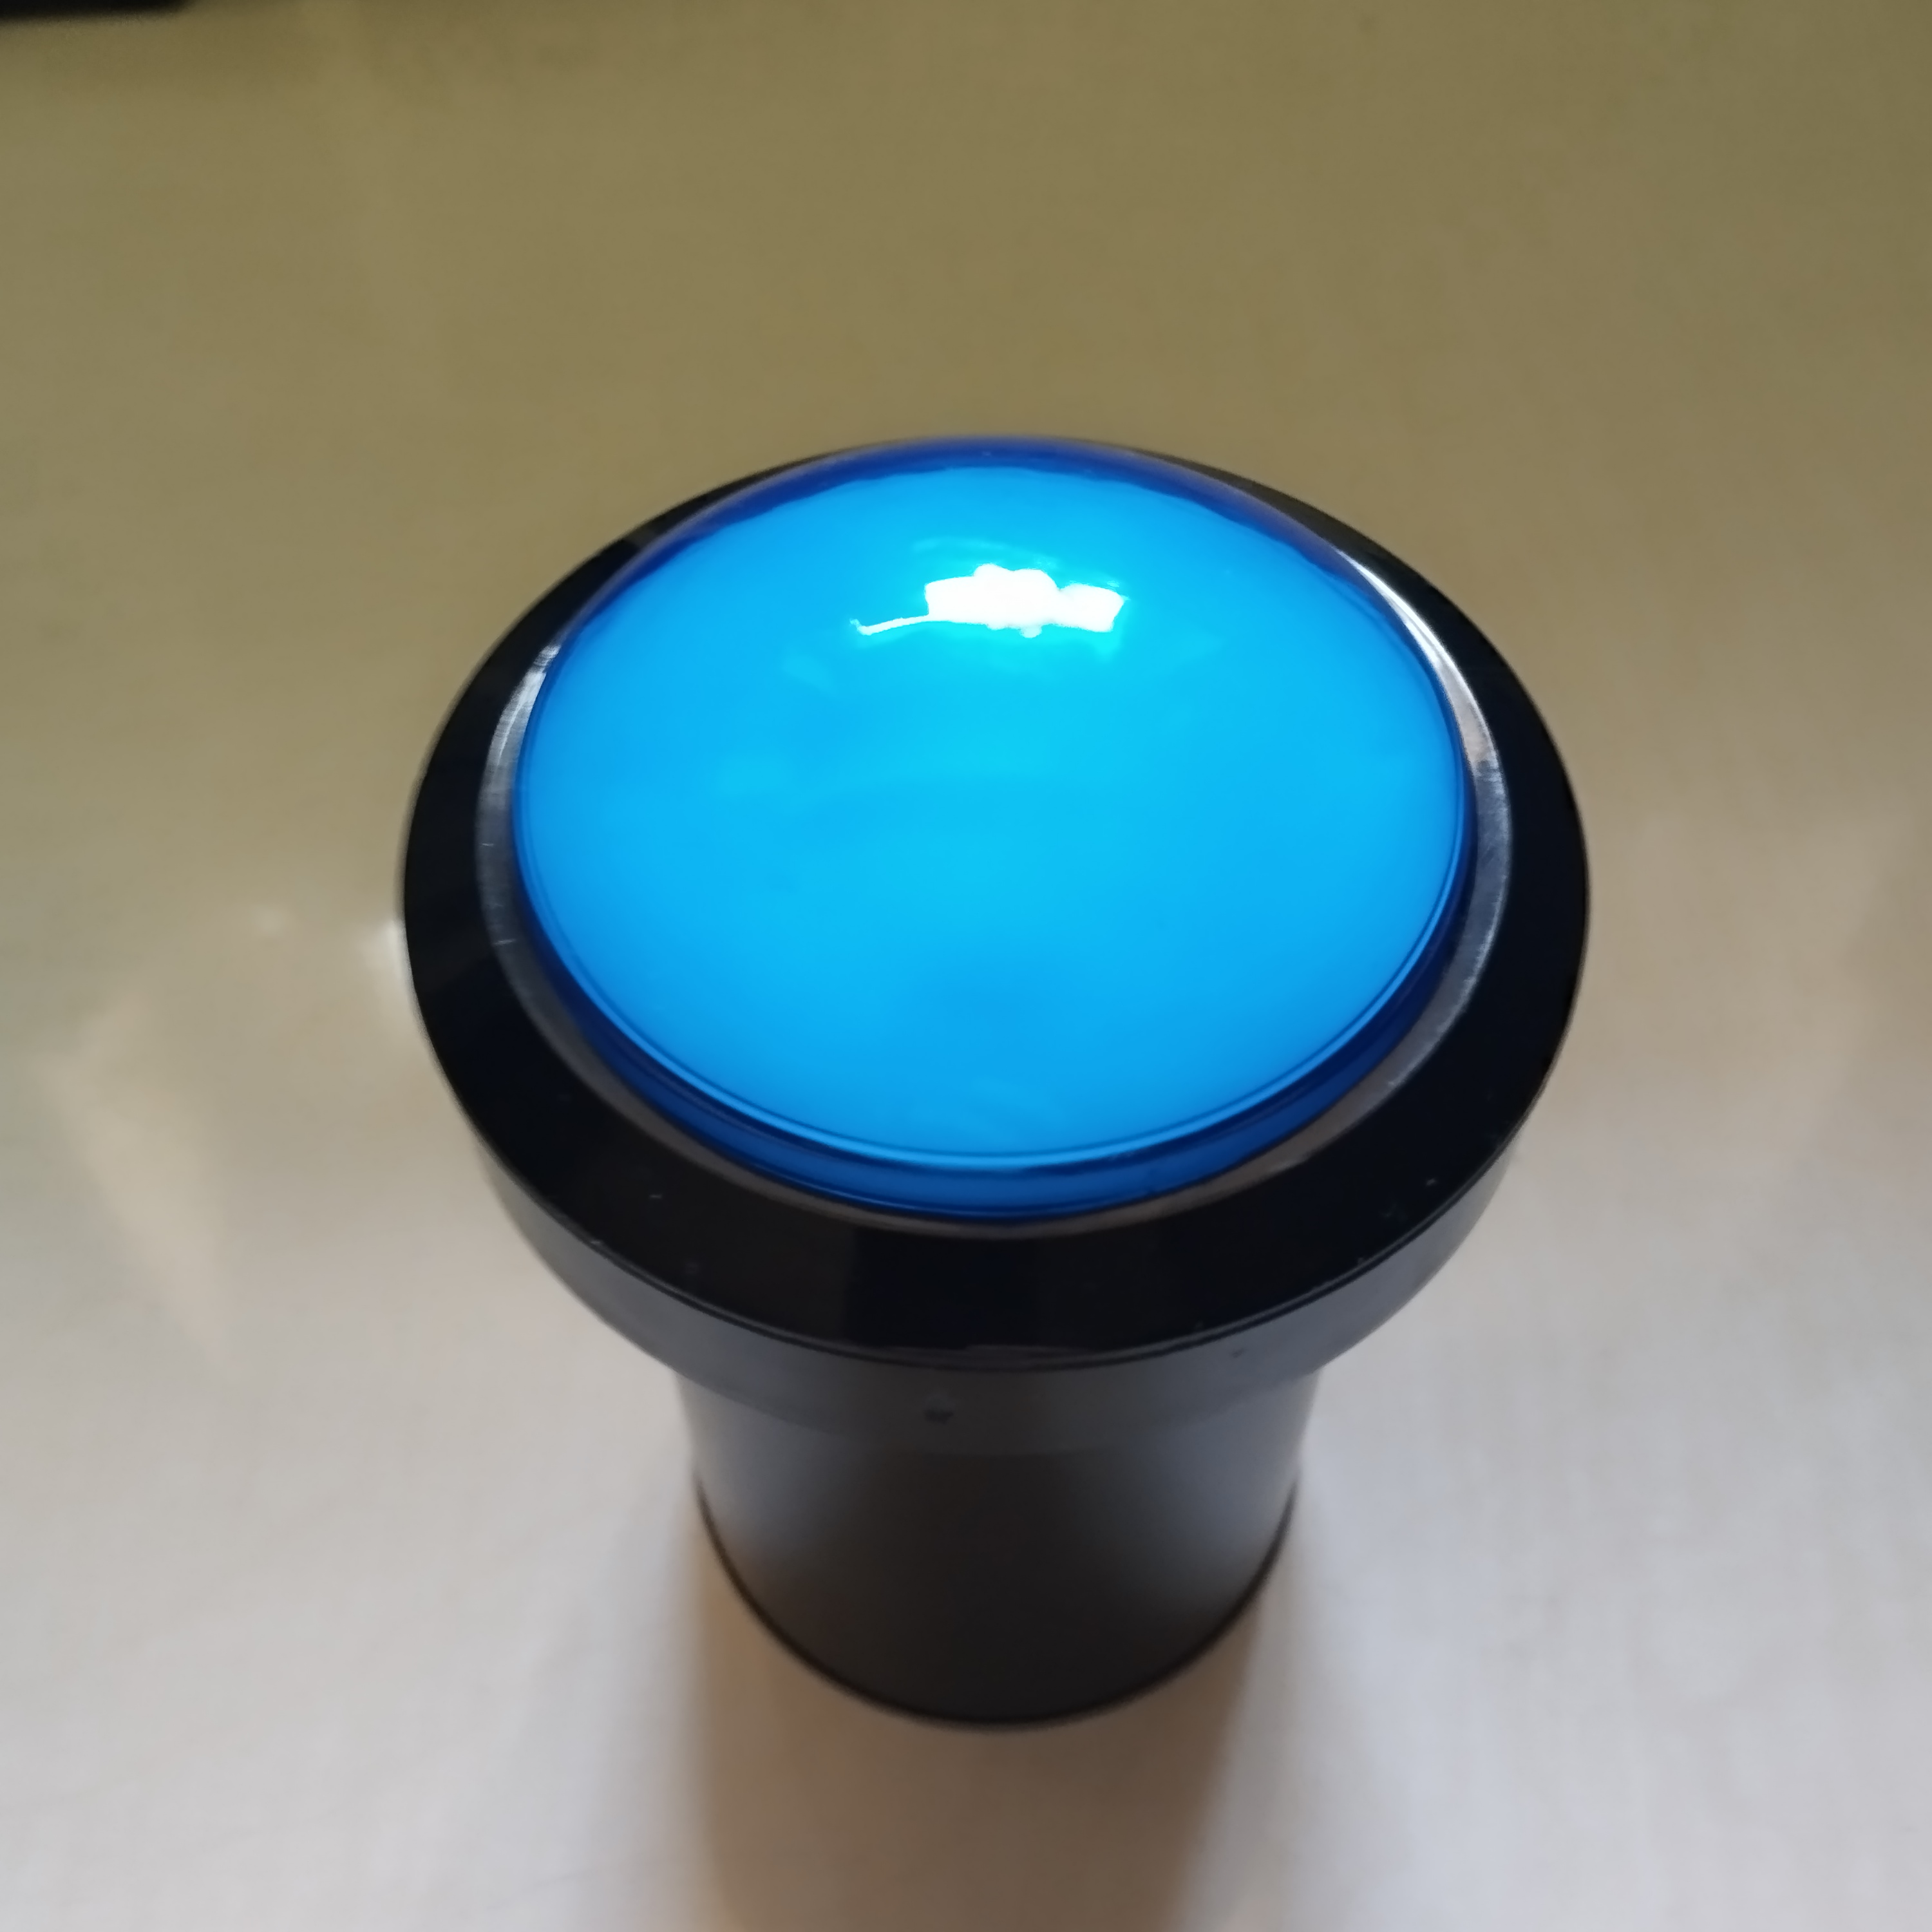
- A push button (e.g., 100mm arcade button)
- CR123A battery + battery holder (see shopping list below)
- Optional: An enclosure (3D print, project box, ashtray from discount store, etc.)
The setup:
- Button connected to GPIO5 and GND
- Use internal pullup resistors (no external electronics needed!)
- When button is pressed: Pin goes LOW → ESP wakes up
┌─────────────┐
│   ESP32-S3  │
│             │
│  GPIO5 ◄────┼──── Button ──── GND
│             │
│  (Pullup    │
│   internal) │
└─────────────┘
The Challenges: A Rocky Road to Success
Problem #1: ESP Wouldn't Enter Deep Sleep
Symptom: The ESP simply didn't want to sleep. Power consumption remained high, battery monitor showed 80-120mA instead of the expected ~10µA.
Diagnosis: On the ESP32-S3, the active USB-Serial connection prevents Deep Sleep! Additionally, BLE wasn't completely disabled.
Solution:
Serial.end();        // End Serial
USBSerial.end();     // ESP32-S3 specific!
btStop();            // Stop Bluetooth completely
esp_deep_sleep_start();
Problem #2: ESP Woke Up Immediately
This was frustrating: The ESP went to sleep... and 300ms later it was awake again. Endless loop!
Cause: The button pin was still LOW (pressed) when going to sleep. The ext0 wakeup triggered immediately because the condition "wake up on LOW" was already met.
Solution: Wait until the button is released!
while(digitalRead(buttonPin) == LOW) {
  Serial.println("Button pressed - waiting...");
  delay(100);
}
delay(500);  // Safety buffer
Problem #3: RTC GPIO Configuration
The ESP32-S3 has a peculiarity: For ext0 wakeup you must explicitly configure the RTC GPIO. Without it, the wakeup doesn't work reliably.
rtc_gpio_init((gpio_num_t)buttonPin);
rtc_gpio_set_direction((gpio_num_t)buttonPin, RTC_GPIO_MODE_INPUT_ONLY);
rtc_gpio_pullup_en((gpio_num_t)buttonPin);
rtc_gpio_hold_en((gpio_num_t)buttonPin);  // Hold config during sleep!
The rtc_gpio_hold_en() is crucial - it ensures that the pin configuration is maintained during Deep Sleep.
Problem #4: "2" Wasn't Being Sent
The ESP woke up, BLE started... but no key was sent. Then the timeout came and it went back to sleep.
Cause: BLE needs 5-10 seconds to connect! But the original 10-second timer was already running when waking up.
Solution: Timer is reset after successful sending:
if(bleKeyboard.isConnected()) {
  bleKeyboard.print("2");
  startTime = millis();  // NOW restart timer!
  Serial.println("Timer restarted - 10 seconds awake");
}
Problem #5: Connection Kept Dropping
After every Deep Sleep, the device had to be paired again. Annoying!
Cause: No bonding information was being stored. The computer saw a "new" device after every wake-up.
Solution: Activate BLE Security with Bonding:
esp_ble_auth_req_t auth_req = ESP_LE_AUTH_REQ_SC_MITM_BOND;
esp_ble_gap_set_security_param(ESP_BLE_SM_AUTHEN_REQ_MODE, &auth_req, sizeof(uint8_t));
// ... more security parameters
And store a fixed MAC address in flash:
void setCustomMacAddress() {
  preferences.begin("ble-button", false);

  if (!preferences.getBool("mac_set", false)) {
    // On first start: Generate random MAC
    uint8_t newMac[6];
    esp_fill_random(newMac, 6);
    newMac[0] = (newMac[0] & 0xFE) | 0x02;  // Locally administered
    preferences.putBytes("mac_addr", newMac, 6);
    preferences.putBool("mac_set", true);
  }

  uint8_t customMac[6];
  preferences.getBytes("mac_addr", customMac, 6);
  esp_base_mac_addr_set(customMac);
}
The Code: Compact and Well-Thought-Out
Here's the final, working code:
#include <BleKeyboard.h>
#include <Preferences.h>
#include "driver/rtc_io.h"
#include "esp_bt_device.h"
#include "esp_gap_ble_api.h"

BleKeyboard bleKeyboard("Blue Button", "Espressif", 100);
Preferences preferences;

const int buttonPin = 5;
const unsigned long awakeTime = 10000;      // 10 seconds awake
const unsigned long bleTimeout = 15000;     // 15 seconds for BLE
bool lastButtonState = HIGH;
unsigned long startTime;
bool alreadySentOnWake = false;

void setCustomMacAddress() {
  preferences.begin("ble-button", false);

  bool macExists = preferences.getBool("mac_set", false);

  if (!macExists) {
    Serial.println(">>> First start - generating new MAC...");
    uint8_t newMac[6];
    esp_fill_random(newMac, 6);
    newMac[0] = (newMac[0] & 0xFE) | 0x02;
    preferences.putBytes("mac_addr", newMac, 6);
    preferences.putBool("mac_set", true);
  }

  uint8_t customMac[6];
  preferences.getBytes("mac_addr", customMac, 6);
  preferences.end();

  esp_base_mac_addr_set(customMac);
}

void setupBLESecurity() {
  esp_ble_auth_req_t auth_req = ESP_LE_AUTH_REQ_SC_MITM_BOND;
  esp_ble_io_cap_t iocap = ESP_IO_CAP_NONE;
  uint8_t key_size = 16;
  uint8_t init_key = ESP_BLE_ENC_KEY_MASK | ESP_BLE_ID_KEY_MASK;
  uint8_t rsp_key = ESP_BLE_ENC_KEY_MASK | ESP_BLE_ID_KEY_MASK;

  esp_ble_gap_set_security_param(ESP_BLE_SM_AUTHEN_REQ_MODE, &auth_req, sizeof(uint8_t));
  esp_ble_gap_set_security_param(ESP_BLE_SM_IOCAP_MODE, &iocap, sizeof(uint8_t));
  esp_ble_gap_set_security_param(ESP_BLE_SM_MAX_KEY_SIZE, &key_size, sizeof(uint8_t));
  esp_ble_gap_set_security_param(ESP_BLE_SM_SET_INIT_KEY, &init_key, sizeof(uint8_t));
  esp_ble_gap_set_security_param(ESP_BLE_SM_SET_RSP_KEY, &rsp_key, sizeof(uint8_t));

  Serial.println(">>> BLE Security activated");
}

void goToSleep() {
  Serial.println("\n>>> Preparing Deep Sleep...");

  // Wait until button is released
  while(digitalRead(buttonPin) == LOW) {
    delay(100);
  }
  delay(500);

  // End BLE cleanly
  bleKeyboard.end();
  delay(500);
  btStop();
  delay(200);

  // Configure RTC GPIO
  rtc_gpio_init((gpio_num_t)buttonPin);
  rtc_gpio_set_direction((gpio_num_t)buttonPin, RTC_GPIO_MODE_INPUT_ONLY);
  rtc_gpio_pullup_en((gpio_num_t)buttonPin);
  rtc_gpio_pulldown_dis((gpio_num_t)buttonPin);
  rtc_gpio_hold_en((gpio_num_t)buttonPin);

  esp_sleep_enable_ext0_wakeup((gpio_num_t)buttonPin, 0);

  Serial.println(">>> Going to sleep...");
  Serial.flush();
  Serial.end();
  USBSerial.end();
  delay(100);

  esp_deep_sleep_start();
}

void setup() {
  Serial.begin(115200);
  delay(1000);

  rtc_gpio_deinit((gpio_num_t)buttonPin);
  rtc_gpio_hold_dis((gpio_num_t)buttonPin);

  pinMode(buttonPin, INPUT_PULLUP);

  Serial.println("\n=== WOKE UP! ===");

  setCustomMacAddress();
  bleKeyboard.begin();
  setupBLESecurity();

  Serial.println("BLE started - waiting for connection...");
  startTime = millis();
}

void loop() {
  // Wait for BLE and then send
  if(!alreadySentOnWake) {
    if(bleKeyboard.isConnected()) {
      Serial.println(">>> BLE CONNECTED! Sending '2'...");
      delay(500);
      bleKeyboard.print("2");
      delay(300);
      Serial.println(">>> '2' sent!");
      alreadySentOnWake = true;
      startTime = millis();  // Reset timer
    } else {
      if(millis() - startTime > bleTimeout) {
        Serial.println(">>> Timeout - sleeping without sending");
        goToSleep();
      }
    }
  }

  // After sending: stay awake for 10 seconds
  if(alreadySentOnWake && millis() - startTime >= awakeTime) {
    Serial.println("\n>>> Timeout!");
    goToSleep();
  }

  // Button during wake time
  bool buttonState = digitalRead(buttonPin);
  if(buttonState == LOW && lastButtonState == HIGH) {
    if(bleKeyboard.isConnected()) {
      Serial.println("Button: Sending '2'");
      bleKeyboard.print("2");
      delay(300);
      startTime = millis();  // Reset timer
    }
    delay(50);
  }
  lastButtonState = buttonState;

  delay(10);
}
How It Works: The Flow
┌─────────────────────────────┐
│   DEEP SLEEP (~10µA)        │
│   CPU: OFF                  │
│   RAM: OFF                  │
│   BLE: OFF                  │
│   RTC: ON (waiting)         │
└─────────────────────────────┘
            │
            │ [Button pressed!]
            ▼
┌─────────────────────────────┐
│   WAKEUP (~300ms)           │
│   - CPU starts              │
│   - setup() runs            │
│   - Load MAC                │
│   - Start BLE               │
└─────────────────────────────┘
            │
            │ [BLE Connection]
            ▼
┌─────────────────────────────┐
│   CONNECTION (2-10 sec)     │
│   - Check bonding keys      │
│   - Secure connection       │
└─────────────────────────────┘
            │
            │ [isConnected()]
            ▼
┌─────────────────────────────┐
│   SEND KEY                  │
│   bleKeyboard.print("2")    │
│   Reset timer               │
└─────────────────────────────┘
            │
            │ [Wait 10 seconds]
            ▼
┌─────────────────────────────┐
│   BACK TO SLEEP             │
│   - Disconnect BLE          │
│   - RTC GPIO config         │
│   - esp_deep_sleep_start()  │
└─────────────────────────────┘
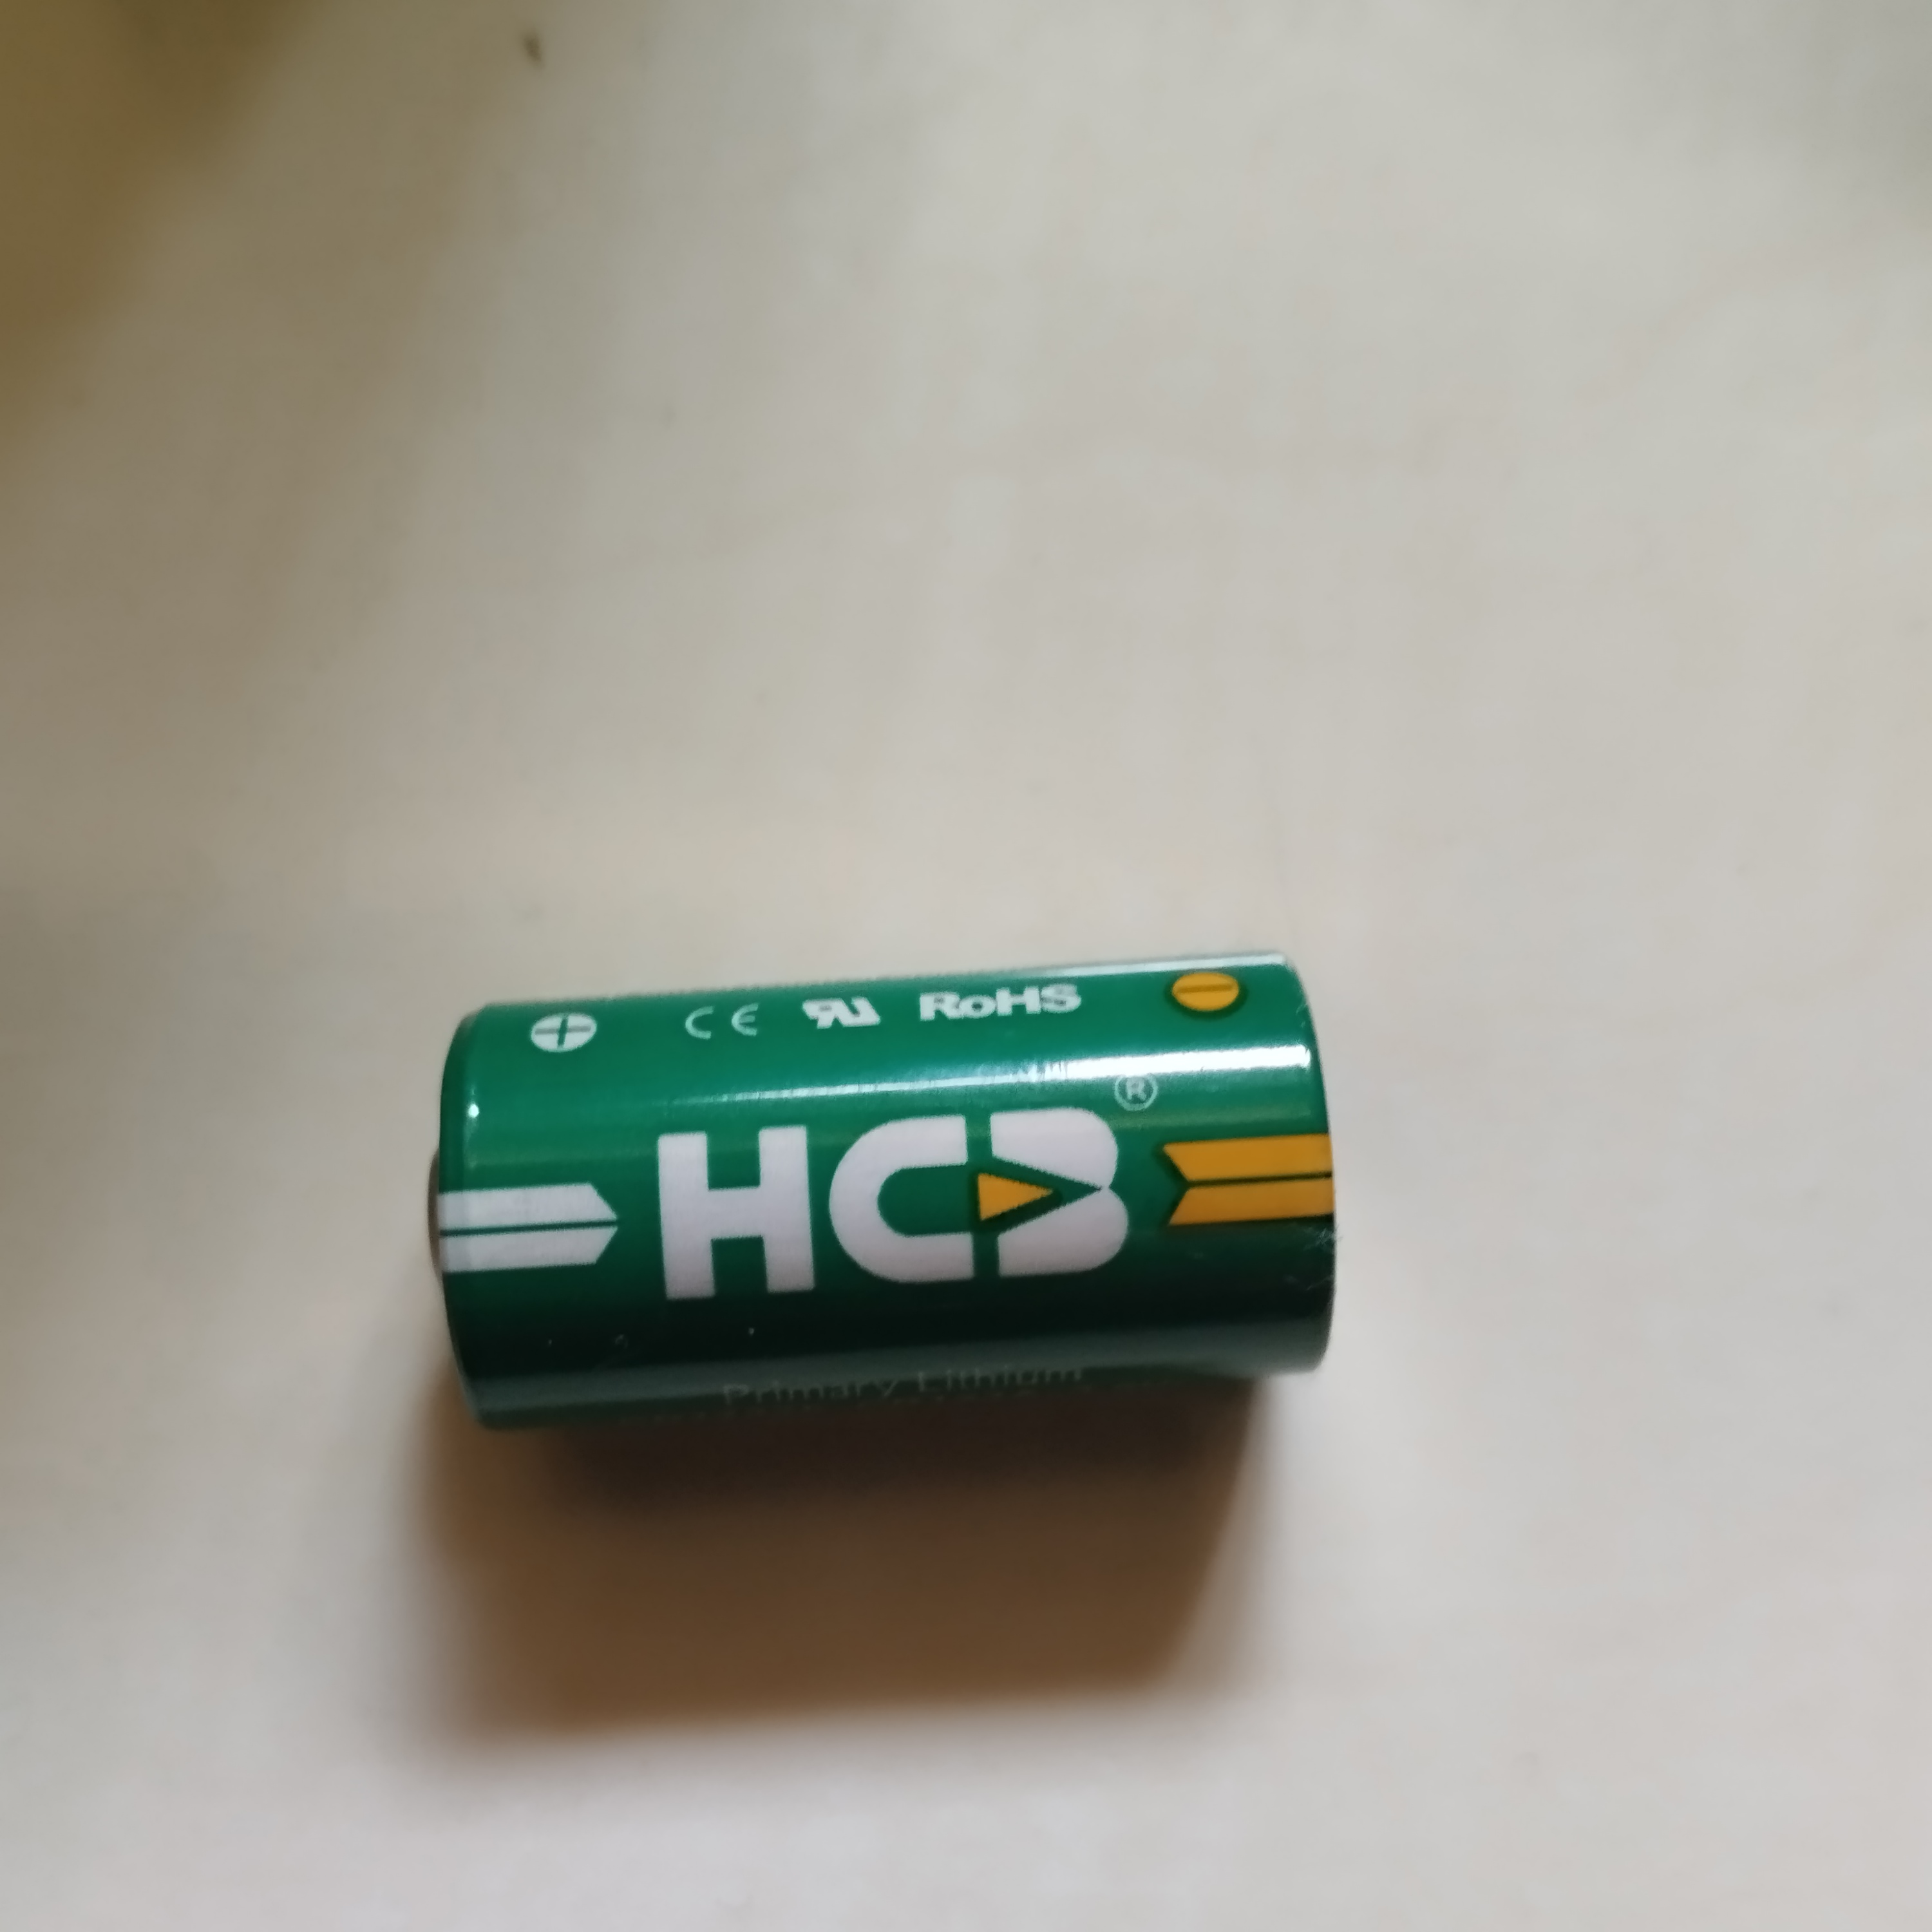
Power Supply with CR123A Battery
For mobile use, I decided on a CR123A battery - a brilliant solution for this project!
Why CR123A?
- High Capacity: 1,500-1,700mAh at 3V
- Compact Form Factor: Perfect for portable devices
- Long Shelf Life: Up to 10 years storage capability
- Stable Voltage: 3V fits perfectly with ESP32 (tolerates 2.3V-3.6V)
- Widely Available: In every electronics or photo shop
Connection
The ESP32-S3 can be powered directly with 3V:
- CR123A Battery: Plus (+) to 3V3 pin
- CR123A Battery: Minus (-) to GND
- Battery holder with switch recommended
Warning: When using USB, don't use the 3V3 pin, power via USB instead! When flashing, disconnect the battery or use a battery holder with a switch.
Power Consumption: The Numbers
| State | Consumption | Duration |
|---|---|---|
| Deep Sleep | ~10-150µA | 99% of the time |
| Wakeup + BLE | ~80-120mA | 2-10 seconds |
| Connected | ~40-80mA | 10 seconds |
| Sending | ~100-150mA | <1 second |
With CR123A (1,600mAh): Theoretically months to years of runtime, depending on button press frequency.
With 10 photo triggers per day:
- 10 × 15 seconds awake = 150 seconds = 2.5 minutes
- Consumption during wake time: ~80mA × 2.5min = ~3.3mAh per day
- Deep Sleep remaining time: ~23.96h × 0.1mA = ~2.4mAh per day
- Total: ~5.7mAh per day
- Runtime with CR123A: approx. 280 days (9+ months)!
With the CR123A battery, the button lasts almost a year - perfect for events!
The Most Important Insights
1. ESP32-S3 is Different
The S3 requires explicit RTC GPIO configuration and terminating USBSerial. The "normal" ESP32 examples often don't work 1:1.
2. Deep Sleep is Picky
The pin status when going to sleep is crucial. Always wait until the button is really released!
3. BLE Takes Time
5-10 seconds for a connection is normal. Plan your timeout accordingly.
4. Bonding is Worth Gold
With bonding, the device automatically reconnects after every wake-up. Without bonding, you have to pair every time.
5. Fixed MAC = Happy Life
Without a fixed MAC, the computer sees a "new" device after every sleep. Storing the MAC in flash solves this problem elegantly.
Why You Should Try It Yourself
This project is perfect for learning:
- Analog Hardware Meets Digital Logic: RTC GPIO, pullups, wakeup sources
- Power Management: Deep Sleep, optimizing power consumption
- Understanding BLE: Bonding, Security, Pairing
- Persistent Data: Preferences Library for flash memory
- Debugging: Serial Monitor, logic analysis, trial & error
And the best part: In the end you have a practical device that's actually useful!
Use at the Wheel of Fortune
The button is used at the tourism wheel of fortune: Visitors press the button, the key "2" is sent, the JavaScript on the Raspberry Pi triggers the photo function. Simple, reliable, no cables.
Visitors love it - especially the haptic component. A real button just feels better than "Press on the screen."
Outlook: What Else Would Be Possible
With this setup you could do much more:
- LED Feedback: Brief flashing on successful transmission
- Battery Monitoring: Measure battery voltage and warn
- Multi-Button: Different keys depending on press duration
- OTA Updates: Update firmware via BLE
- Motion Sensor: Additional wakeup via accelerometer
Let's Go!
Do you feel like building your own BLE button? Perfect! Get yourself an ESP32-S3, a button and get started. The code is there, the explanations too.
And if you have questions or want to share your project - feel free to contact me!
Happy Hacking!
Shopping List - Everything You Need
Here you'll find all the components you need for this project. The links go to Amazon and are affiliate links where you can order the parts directly:
Main Components
ESP32-S3 Development Board
- ESP32-S3 DevKit (2-pack)
- Recommendation: The 2-pack is cheaper per board and you have backup for more projects
100mm Arcade Button
- LED Arcade Button 100mm (various colors)
- Large, good-feeling button - perfect for events
- Alternative: Standard Arcade Button 60mm
Power Supply
CR123A Batteries
- Varta CR123A Lithium Batteries (2-pack)
- High-quality brand batteries with long life
Battery Holder for CR123A
- CR123A Battery Holder with Connection Cable
- With switch for easy on/off
- Alternative: CR123A Holder without Switch (cheaper)
Optional but Useful
USB-C Cable for Flashing
- USB-C Data Cable
- Important: Use data cable, not just charging cable!
Jumper Cables
- Dupont Jumper Cable Set
- For easy connecting during prototyping
Estimated Total Cost
- Minimal Setup: ~$25-30 (ESP32, button, battery + holder)
Have fun building! 🛠️
Hardware Used:
- ESP32-S3 Dev Module
- 100mm Arcade Button
- CR123A Battery + Battery Holder
- Optional: Enclosure
Required Libraries:
- ESP32-BLE-Keyboard
- Preferences (ESP32 Core)
- driver/rtc_io.h (ESP32 Core)
Board Manager for ESP32:
- Version 2.0.17 !!!
Power Supply:
- For Development/Flashing: USB-C Cable
- For Production Use: CR123A Battery with Battery Holder (see shopping list)
Here is the complete code for the ESP32-C3 BLE button with Deep Sleep:
- A fork of ESP32-BLE-Keyboard by T-vK was used, which is compatible with the ESP32-C3: Fork by lewisxhe
- Additionally, the NimBLEDevice.h library is needed for the security settings.
#include <BleKeyboard.h>
#include <Preferences.h>
#include "esp_sleep.h"
#include "driver/gpio.h"
#include "esp_system.h"
#include <NimBLEDevice.h>

BleKeyboard bleKeyboard("Blue Button", "Espressif", 100);
Preferences preferences;

const int buttonPin = 3;  // ESP32-C3 GPIO3
const unsigned long awakeTime = 10000;      // 10 seconds awake
const unsigned long bleTimeout = 15000;     // 15 seconds for BLE
bool lastButtonState = HIGH;
unsigned long startTime;
bool alreadySentOnWake = false;

void goToSleep() {
  Serial.println("\n>>> Preparing Deep Sleep...");

  // Wait until button is released
  while(digitalRead(buttonPin) == LOW) {
    delay(100);
  }
  delay(500);

  // Cleanly terminate BLE
  Serial.println(">>> Ending BLE...");
  bleKeyboard.end();
  delay(500);

  Serial.println("\n>>> Configuring Deep Sleep GPIO Wakeup...");

  // Create GPIO pin mask
  uint64_t gpio_pin_mask = (1ULL << buttonPin);

  // Enable Deep Sleep GPIO Wakeup
  esp_err_t err = esp_deep_sleep_enable_gpio_wakeup(
    gpio_pin_mask,
    ESP_GPIO_WAKEUP_GPIO_LOW
  );

  if (err == ESP_OK) {
    Serial.printf("OK - Deep Sleep Wakeup for GPIO %d enabled\n", buttonPin);
  } else {
    Serial.printf("ERROR in GPIO Wakeup Config: %d\n", err);
  }

  Serial.printf("GPIO %d status before sleep: %d\n", buttonPin, digitalRead(buttonPin));
  Serial.println("\n>>> Going to sleep... (Press button to wake up)");
  Serial.flush();
  delay(200);

  esp_deep_sleep_start();
}

void setup() {
  Serial.begin(115200);
  delay(2000);

  pinMode(buttonPin, INPUT_PULLUP);

  Serial.println("\n=============================");
  Serial.println("=== ESP32-C3 WOKE UP! ===");
  Serial.println("=============================");

  esp_sleep_wakeup_cause_t wakeup_reason = esp_sleep_get_wakeup_cause();
  Serial.printf("Wakeup Cause: %d\n", wakeup_reason);

  switch(wakeup_reason) {
    case ESP_SLEEP_WAKEUP_GPIO:
      Serial.println(">>> SUCCESS: Wakeup by GPIO!");
      break;
    case ESP_SLEEP_WAKEUP_TIMER:
      Serial.println(">>> Wakeup by Timer!");
      break;
    case ESP_SLEEP_WAKEUP_UNDEFINED:
    default:
      Serial.println(">>> Power-On / Reset / Upload");
      break;
  }

  Serial.printf("GPIO %d status: %d\n", buttonPin, digitalRead(buttonPin));

  // FIRST start BleKeyboard
  Serial.println("\n>>> Starting BLE Keyboard...");
  bleKeyboard.begin();
  delay(1000);  // Important: Wait until BLE is fully initialized!

  // THEN configure Security
  Serial.println(">>> Configuring Bonding...");
  NimBLEDevice::setSecurityAuth(BLE_SM_PAIR_AUTHREQ_BOND);
  NimBLEDevice::setSecurityIOCap(BLE_HS_IO_NO_INPUT_OUTPUT);

  Serial.println("OK - Just Works Bonding enabled!");
  Serial.println("==============================");
  Serial.println("  PAIRING: No PIN required!");
  Serial.println("==============================");
  Serial.println("\nPAIRING INSTRUCTIONS:");
  Serial.println("  1. Open Bluetooth settings");
  Serial.println("  2. Search for 'Blue Button'");
  Serial.println("  3. Tap 'Connect'");
  Serial.println("  4. Confirm pairing (no PIN!)");
  Serial.println("  5. Connection will be saved!");
  Serial.println("  6. On next wake-up: Auto-Reconnect!\n");

  Serial.println("BLE started - waiting for connection...");
  startTime = millis();
  alreadySentOnWake = false;
}

void loop() {
  // Wait for BLE and then send
  if(!alreadySentOnWake) {
    if(bleKeyboard.isConnected()) {
      Serial.println("\n>>> BLE CONNECTED!");
      Serial.println(">>> Sending '2'...");
      delay(500);
      bleKeyboard.print("2");
      delay(300);
      Serial.println(">>> '2' sent successfully!");
      alreadySentOnWake = true;
      startTime = millis();
    } else {
      // Show waiting time
      unsigned long elapsed = millis() - startTime;
      if(elapsed % 2000 < 50) {  // Every 2 seconds
        Serial.printf("Waiting for BLE... (%lu/%lu ms)\n", elapsed, bleTimeout);
      }

      if(elapsed > bleTimeout) {
        Serial.println("\n>>> BLE Timeout - going to sleep");
        Serial.println("Tip: Check pairing in Bluetooth settings!");
        goToSleep();
      }
    }
  }

  // After sending: stay awake for 10 seconds
  if(alreadySentOnWake && millis() - startTime >= awakeTime) {
    Serial.println("\n>>> Awake timeout reached!");
    goToSleep();
  }

  // Button during awake time
  bool buttonState = digitalRead(buttonPin);
  if(buttonState == LOW && lastButtonState == HIGH) {
    if(bleKeyboard.isConnected()) {
      Serial.println("\n>>> Button pressed - Sending '2'");
      bleKeyboard.print("2");
      delay(300);
      Serial.println(">>> '2' sent!");
      startTime = millis();  // Reset timer
    } else {
      Serial.println("\n>>> Button pressed - but not connected!");
    }
    delay(50);
  }
  lastButtonState = buttonState;

  delay(10);
}